Knowing how to build a concrete panel fence correctly makes the difference between a boundary that stands firm for thirty years and one that starts leaning and rotting within a decade. Concrete fencing is the material of choice for homeowners and landowners across Lincolnshire, South Yorkshire, and the wider East Midlands because it is strong, maintenance-free, and genuinely built to last. This guide walks you through the whole process from start to finish, so you can get it right first time.
What You Will Need Before You Start
Gathering your materials and tools before you begin will save you a lot of unnecessary trips back to the yard. For a standard concrete panel fence with 6ft panels, you will need:
- Slotted concrete fence posts (8ft posts for 6ft panels with a gravel board underneath)
- Concrete gravel boards (one per bay, typically 6 inches high)
- Fence panels (timber or composite, your choice)
- Post mix concrete (one or two bags per post depending on soil type)
- A spirit level, a spade, a string line and pegs, a tape measure, and a lump hammer
- Someone to help with the heavy lifting
If you are not sure how many posts you need, count your panels and add one. A run of six panels needs seven posts. Check our prices page for current stock and costs on all materials.
Step 1: Plan the Line of Your Fence
Before you dig a single hole, spend time planning your fence line accurately. Drive a peg into the ground at each end of the run and pull a string line taut between them. This gives you a straight, consistent reference to work from and saves you having to correct a crooked post line later.
Mark the position of each post along the string line. Standard concrete fence panels are 1.83 metres (6 feet) wide, so your posts need to be spaced at 1.83 metres apart, centre to centre. Double-check your measurements before you start digging because repositioning a post once the concrete has gone off is considerably harder than getting it right at the planning stage.
Quick tip: If your fence line runs along a boundary with a neighbour, confirm the exact position before you start. A small error at the planning stage can become a significant dispute once the fence is up.
Step 2: Dig Your Post Holes
Concrete fence posts need to be buried to a depth of roughly one third of their total length to be stable. For an 8ft post, that means digging down to around 2ft 6in. In soft or clay-heavy soils, which are common across North Lincolnshire and parts of South Yorkshire, aim for a slightly deeper hole to give the post extra purchase in the ground.
Make each hole wide enough to pour concrete around the post comfortably. A hole around 200-250mm in diameter works well for most post sizes. A post hole borer (also called a post hole digger or auger) makes this job faster and easier than digging with a spade alone.
Step 3: Set Your First and Last Posts
Always set your end posts first and get them perfectly plumb before working on the intermediate posts. Drop your first concrete fence post into the hole with the slots facing along the direction of the fence run. Use your spirit level on two adjacent faces to check it is perfectly upright, then pack it temporarily with a couple of pieces of timber to hold it in position.
Mix your post mix concrete according to the instructions on the bag and pour it around the base of the post. Work it down with a piece of rod or a stick to remove any air pockets. Trowel the top to slope slightly away from the post so rainwater runs off rather than pooling at the base.
Repeat this process for your last post, checking it is also plumb and that the slots on both end posts are aligned to face the same direction. Pull a string line between the tops of the two end posts as a guide for all the intermediate posts.
Step 4: Set the Intermediate Posts and Fit Gravel Boards
With your end posts set, work your way along the fence run setting each intermediate post. Here is where the slotted design of concrete posts really earns its keep. As you set each new post, you can slide the gravel board into the slot from the previous post before filling in with concrete. This locks everything in position and means your panels can simply drop in from the top once all the posts are set.
Fit a concrete gravel board into the lower slot of each bay before filling that post with concrete. Gravel boards sit at ground level and protect the bottom of your fence panels from soil contact, moisture, and rot. They are particularly important in the damp soils you find across much of Lincolnshire and the East Midlands, where the base of a timber fence panel can deteriorate surprisingly quickly without this protection.
Check each post for plumb as you go. Once the concrete sets, there is no adjustment to be made.
Step 5: Allow the Concrete to Cure Before Fitting Panels
This is the step many people are tempted to skip, but it matters. Post mix concrete is typically workable within a few hours but it needs at least 24 hours before you put any load through it. In cold or wet weather, allow longer. Fitting your fence panels before the concrete has properly hardened can cause the posts to shift slightly out of plumb, leaving you with a fence that looks wrong and potentially needs re-setting.
Use this time to check the fence line from a distance. Walk back and look along the run from one end. Any posts that are leaning slightly will be obvious at this stage and can be corrected before the concrete fully cures.
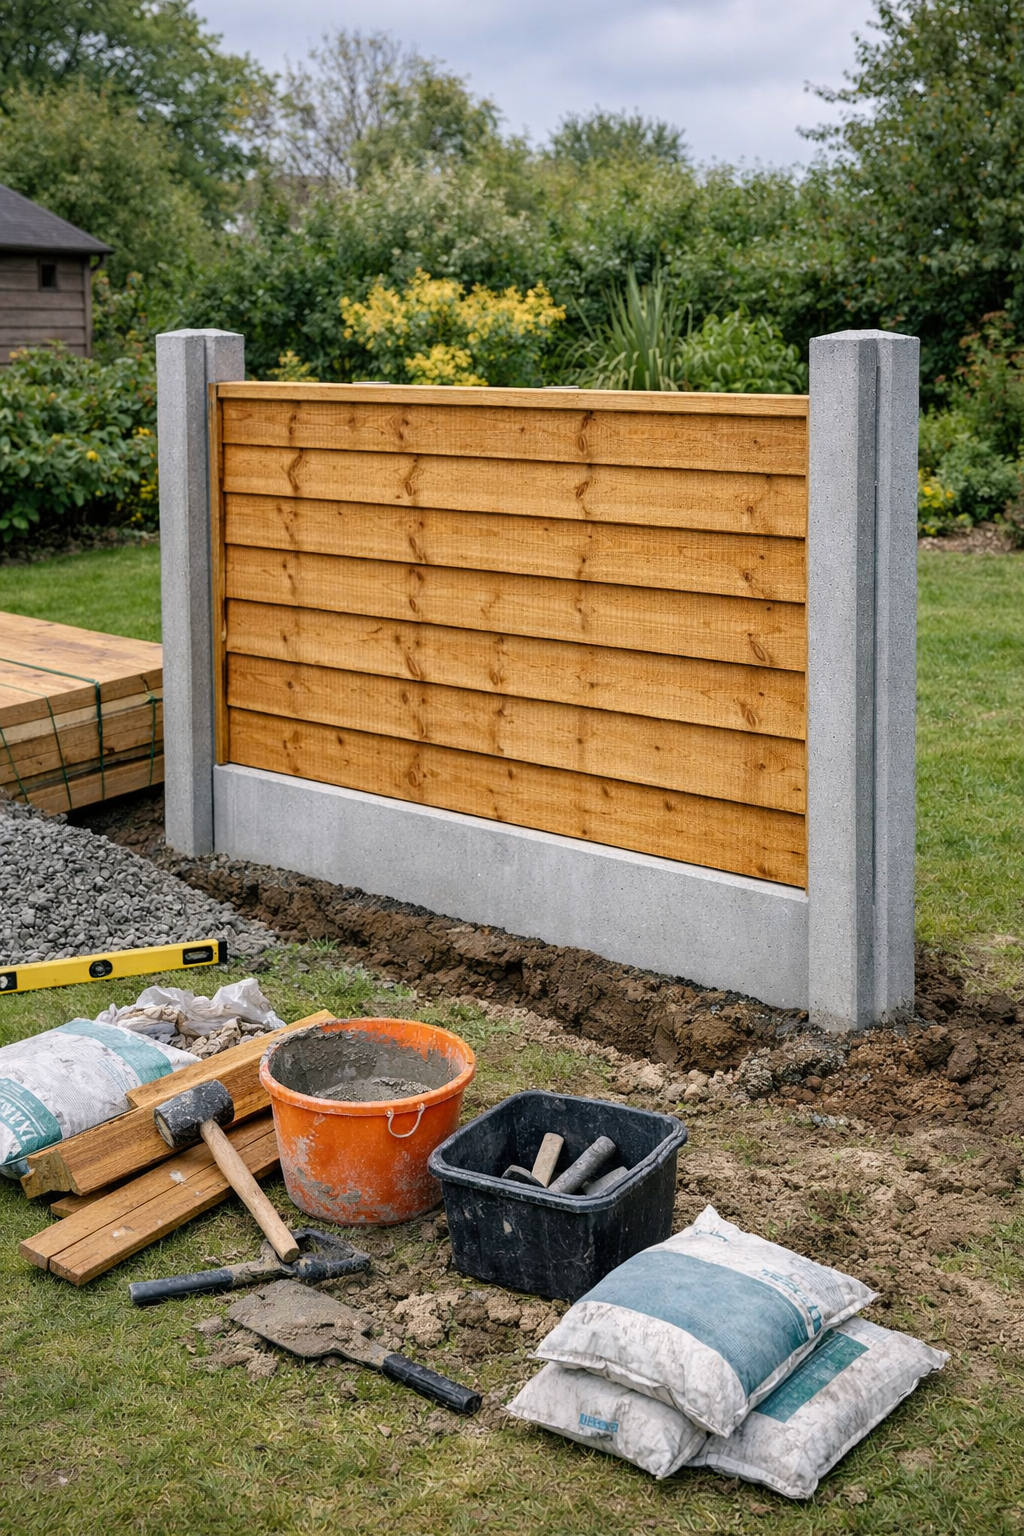
Step 6: Drop in Your Fence Panels and Finish
Once the concrete is fully cured, fitting the fence panels is straightforward. Drop each panel down into the slots from the top of the posts, sitting them on top of the gravel board. The slots on a slotted concrete post are designed to accept standard 150mm (6 inch) deep boards and panels, so everything lines up neatly.
Work along the fence run from one end, fitting panels one at a time. When all panels are in, step back and check the overall appearance. If any panel is sitting unevenly, you can usually adjust it by shimming the gravel board slightly with a piece of plastic packing.
There is no painting, sealing, or treating required with concrete posts and concrete gravel boards. Once they are in, they are done.
Why Concrete Is the Right Choice for Lincolnshire Gardens and Boundaries
Concrete fencing is particularly well suited to the conditions across Lincolnshire, South Yorkshire, and North Nottinghamshire. The clay-heavy soils in much of this region are hard on timber posts, accelerating rot and causing them to loosen over time as the ground moves through wet and dry cycles. Concrete posts are completely unaffected by this. They do not rot, they do not warp, and they do not need any treatment once they are in the ground.
Many of our customers near Gainsborough and across the East Midlands who made the switch from timber to concrete say they wish they had done it sooner. The upfront cost is slightly higher than timber, but when you factor in that you will never need to replace the posts, the concrete option is significantly better value over the life of the fence.
Ready to build your concrete panel fence? We supply steel-reinforced slotted concrete fence posts, concrete gravel boards, and concrete slabs to homeowners and trade customers across Lincolnshire, South Yorkshire, and North Nottinghamshire. We can help you work out exactly what you need and get it to you quickly.
Give us a ring on 07989 192742, send a WhatsApp, or fill in our contact form and we will get back to you the same day.
Get a Quote Today